Using the Native OS X Driver for any Zebra Printer that accepts EPL2 (10.5.6+)
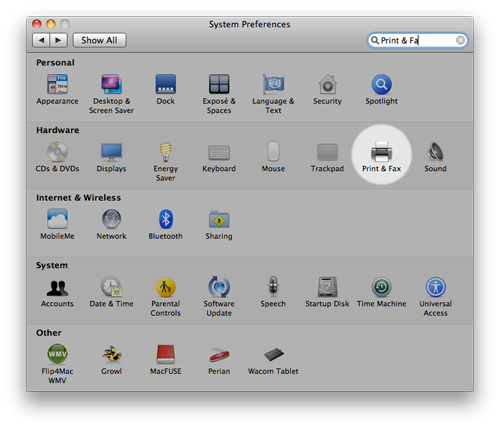
Step 1: Open Printer and Fax Settings
Choose System Preferences from the Apple Menu and select Print & Fax.
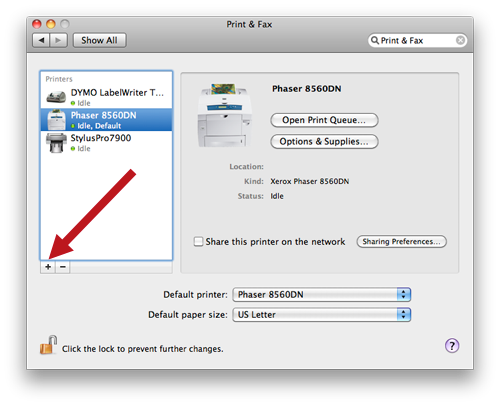
Step 2: Add A Printer
Press the + button at the bottom of the list of printers to add a new one.
Step 3: Select your Zebra Printer
Choose your printer from the list. You can use a shared printer if one is available.
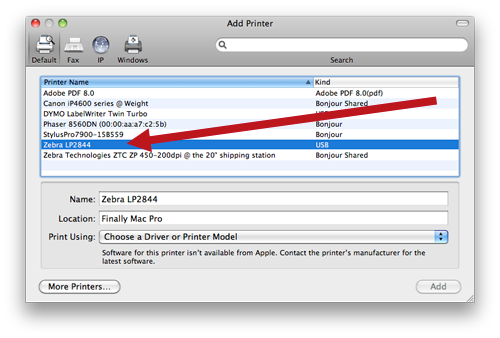
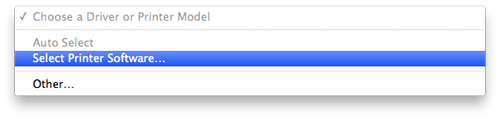
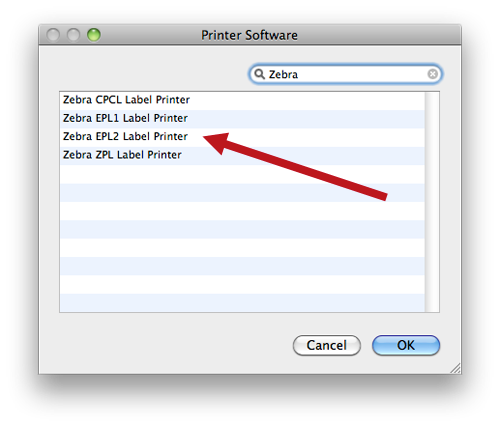
Your Mac won't be able to autodetect the Zebra printer's driver, so you'll need to choose "Select Printer Software..." from the "Choose a Driver or Printer Model" drop down.
A new window will appear. Type "Zebra" into the search field at the top and select the Zebra EPL2 (or ZPL if your printer model is the ZP450, GX420 or GK420) printer driver.
Choose OK, and your printer will be added.
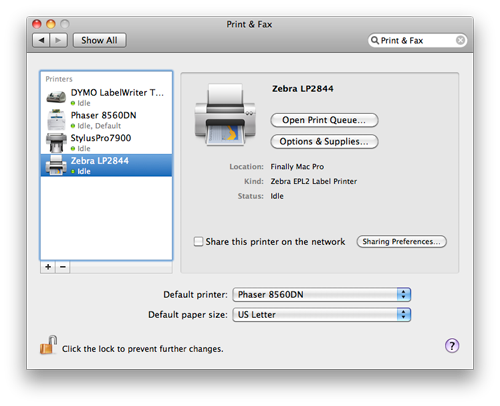
You can now close this window and launch (or return to) Endicia for Mac.
Step 4: Configure Endicia for Mac
Select Printer Setup from the toolbar.
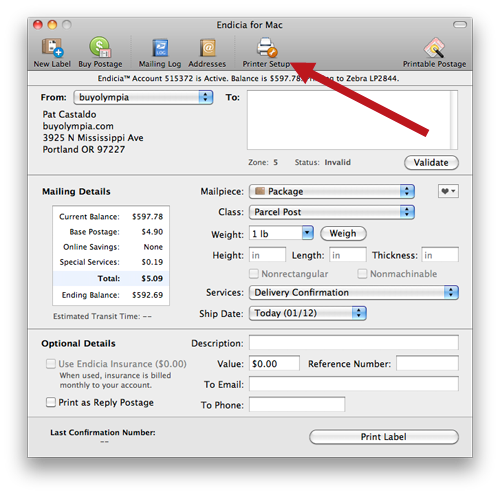
Choose "Configure Zebra..."

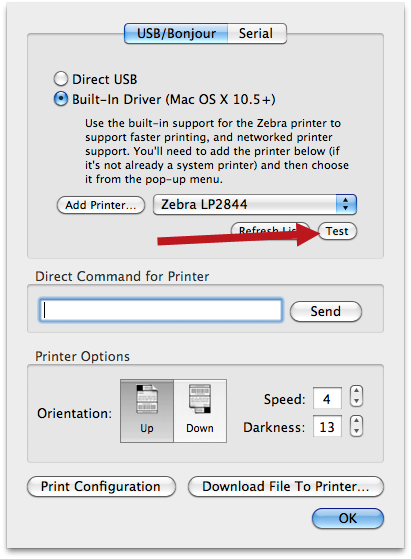
Select the "Built-In Driver" option.
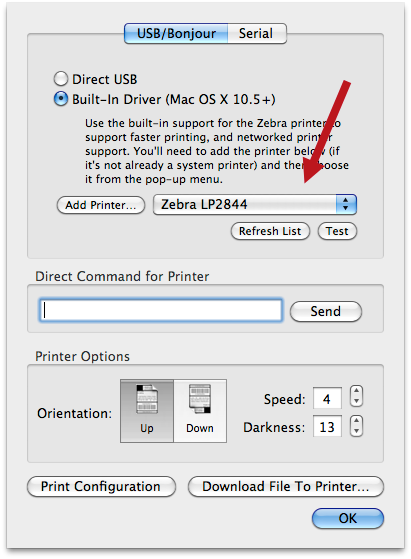
Then, do a printer test. You should see a configuration sheet come out of your Zebra printer.
And that's it, you should be all set.